A number of key terms in the feature articles are important to understand right from the beginning. Understanding these terms now will smooth your study path as you proceed through these articles. Note carefully that many of these definitions use other key terms that are also defined herein. When this happens, I have listed these terms in bold to help make it clear that the meaning used is the one defined herein.
Generally when I use the term document as a noun, I mean the entirety of the content of your Dr.Explain project. In the case of compiled help (CHM) or PDF or RTF output, this document is indeed contained in one single file. In the case of HTML output, this document spans multiple HTML pages that each comprise a "part" of the whole referred to by the term document.
The term topic is a term that comes from Microsoft HTML Help Workshop. Wherever this term is used in the feature articles, it means "HTML page", as it does in HTML Help Workshop. When the document generated by Dr.Explain are compiled help (CHM) or on-line help (HTML files), indeed topic means literally: "HTML page".
When the document generated is PDF or RTF, which contain the HTML content in one continuous sequence (as if you had clicked the "Next Page" link through the whole document), the meaning of the term "page" is different -- usually meaning that which, when printed, can fit on a single sheet of paper. Thus, in this context, a topic is going to start on a certain page, but may occupy multiple pages, after which the next topic follows, etc.
|
"A ... screenshot (or screen shot) ... is an image taken by the computer user to record the visible items displayed on the monitor, television, or another visual output device. Usually, this is a digital image using the (host) operating system or software running on the computer, but it can also be a capture made by a camera or a device intercepting the video output of the display (such as a DVR). That latent image converted and saved to an image file such as to JPEG or PNG format is also called a screenshot.
"Screenshots can be used to demonstrate a program, a particular problem a user might be having, or generally when display output needs to be shown to others or archived. ..."
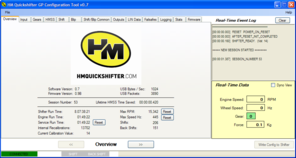
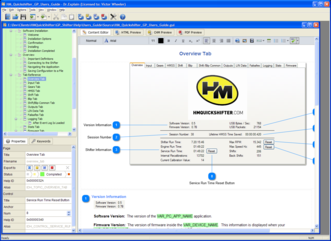
In Dr.Explain, a screenshot is the "central" image in a screenshot layout page. Usually it is indeed a screenshot from a Windows software application. But it doesn't have to be. See Terminology Clarification below.
|
A Screenshot
|
|
"In publishing, a call-out or callout is a short string of text connected by a line, arrow, or similar graphic to a feature of an illustration or technical drawing, and giving information about that feature. The term is also used to describe a short piece of text set in larger type than the rest of the page and intended to attract attention.
"A similar device in word processing is a special text box with or without a small "tail" that can be pointed to different locations on a document."
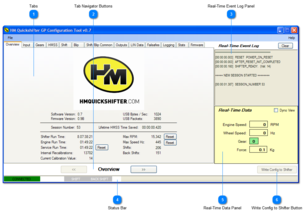
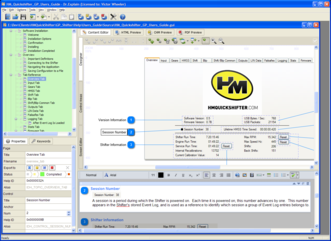
In Dr.Explain, a callout is an artifact added to a screenshot image (added automatically or manually) which consists of:
-
a number (called a "bullet mark" in Dr.Explain) -
-
a line leading to a part of the screenshot image defined by the control area, and -
a control area (see definition below).
|
A Screenshot with Callouts
|
|
The term control is usually reserved to name a part of a Windows application that the user interacts with. Examples of controls are: buttons, text boxes, drop downs, checkboxes, etc.
However, note carefully that Dr.Explain (and the Dr.Explain Help file) sometimes uses the term control in an unusual way, and it is important to understand this to prevent confusion: sometimes Dr.Explain uses the term control to refer to a callout.
|
Examples of Controls
|
|
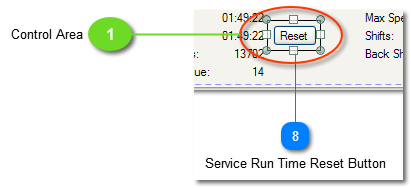
A control area defines the area of the screenshot that its owning callout is calling attention to. This control area is usually a rectangle, and it usually encapsulates the image of a control in the screenshot. But it doesn't have to. See Terminology Clarification below.
|
Control Area
|
For the sake of concise wording, throughout both my major articles about Dr.Explain, I use the term "attached" to refer to the relationship between a callout and the portion of the screenshot encapsulated by the callout's control area. For example, if the callout is documenting a button, I will say: "the callout is attached to a button in the screenshot". While in reality, the callout has a control area, which encircles or encapsulates a sub-image in the screenshot, and that sub-image is an image of a button, simply saying "the callout is attached to a button in the screenshot" is much shorter and both easier to read and easier to understand.
|
One of Dr.Explain's main features is that it has two types of layouts for documentation pages you create. One of them is a regular HTML layout page where a WYSIWYG editor provides most of the commonly-used layout features available in HTML.
To add a page (topic) with this type of layout, place focus on the parent node in the table-of-contents tree (the node that will "contain" the new page) and click the Add Topic button in the main toolbar, or select Options > Add Topic from the menu. In these articles, I call this layout type a "basic layout". An example of a basic layout is this page. The icon for a basic layout page in the table-of-contents tree looks like a sheet of paper.
|
Screenshot of a Page with Basic Layout
|
|
The second type of layout, which I am calling the screenshot layout, builds on top of the basic layout, and adds some extremely useful automation to it. Specifically, in this type of layout, a "central" image exists (called a screenshot), and that image can contain a virtually unlimited quantity of numbered callouts (zero or more), and for each such callout, a section is automatically created on that page, in numerical sequence below the main image, for detailed documentation of what the callout is calling attention to -- whatever image is encapsulated in its control area. In that section, the number (a.k.a. bullet mark), name, and sub-image the control area defines, is automatically displayed in the upper left corner of that section, ready for you to add the detailed description for that callout.
To add a page ( topic) with this type of layout, place focus on the parent node in the table-of-contents tree (the node that will "contain" the new page) and click the Capture window button in the main toolbar (or one of its derivatives in the drop-down menu that drops down from that button), or select Options > Add Window from the menu (or one of its derivatives in the same section on the Options menu). An example of a typical screenshot layout page is Screenshot Example 2 -- Massaged. The icon for such a page in the table-of-contents tree looks like a sheet of paper with a small software application window on top of it.
The automation added to screenshot layouts starts with the fact that for each callout added to the screenshot image, a section is reserved on the same page for detailed documentation connected with that callout. However, it doesn't stop there: Dr.Explain provides automation that, when you are documenting a running Windows software application, can create most of the screenshot layout page for you. It is here that Dr.Explain provides one of its most powerful features: if you employ Dr.Explain to capture the screenshot from a running application, it actually analyzes the window (or window portion) being captured and automatically creates callouts for most of the controls in the captured area. This means that often all you have to do to finish such a screenshot layout page page, is adjust the callouts as you see fit, delete callouts you don't need, and add the detailed descriptions to the callout sections below the screenshot. And you're done!
|
Screenshot of a Page with Screenshot Layout
|
|
Screenshot of a Page with
Screenshot Layout in "Edit Mode"
|
From the Collins English Dictionary: verb, to supply (a written work, such as an ancient text) with critical or explanatory notes.
An "editor" in Dr.Explain especially designed for editing
screenshot layout images with their
callouts. It can be entered by double-clicking the
screenshot image. It gives you control over the image itself (size, cropping, text labels), as well as control of each
callout (number, description,
control area). From the
Annotation Designer you are one click away from the Annotation Designer Settings dialog, which gives you complete control of the
callout styles used on that
topic (page). See
Annotation Designer for more details. The size and borders of the image can be controlled via right clicking and selecting the
Image Properties... option. See
Flexible Control of All Images for more details on the latter.
Terminology Clarification:
|
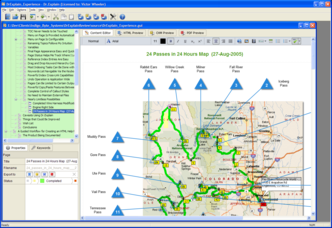
Note carefully: while using Dr.Explain to create documentation, especially when documenting Windows software applications, the screenshots in screenshot layout pages will indeed often be screenshots from the software application being documented. However, they don't have to be. In fact, they can be almost any image that can be displayed on a computer. Thus, the screenshot in a screenshot layout page may be a diagram, an electronics schematic, an X-ray image, a photograph, an "exploded parts" view of a product, or virtually anything at all that you want to document. This is possible because screenshot layout pages can also be added (or replaced) with an image from another captured screen, an image contained in a file, or from the Windows clipboard. Thus the possibilities are almost limitless.
|
Map with Callouts as "The Screenshot"
on Screenshot Layout Page
|
While Dr.Explain can automate a great deal of the process of capturing and documenting
screenshots of running Windows software applications, in this context, because
callouts are usually attached to
controls in a
screenshot, in Dr.Explain and in its Help File,
callouts are sometimes referred to as
controls. For example, in a
screenshot layout, double-clicking the
screenshot causes the
screenshot layout window to go into
Editing Mode (a.k.a. Annotation Designer). In that mode a toolbar button is available called "New control". When clicked, the "New control" button simply adds a new
callout to the
screenshot image, along with its reserved section below the
screenshot image, and lets you number it, name it, position it, and position its
control area wherever you want them.
Thus, callouts are not always attached to controls. In conjunction with the nearly limitless possibilities outlined above for screenshot images, there are nearly limitless possibilities for what a callout can be attached to.
Bottom Line: Dr.Explain provides automated documentation tools that are limited only by your imagination.
Now that you have (hopefully) mastered these terms, you are ready to tackle the featured articles.
The Featured Articles
Here I tried to summarize what I thought would be useful to someone searching for good general Tech-Writing Tools or for good HTML Help Authoring Software.
In this article, I recorded the steps I took to create a high-quality HTML Help File (.CHM) and User's Guide (.PDF) with nearly identical content.
This is a generic How-To article on creating an index for a large help file, document or book, and can be applied anywhere that supplying an index to significant reference material will make it more useful to its readers.
These are the steps that I took to add Context Sensitive Help to a Visual Basic.NET application, using an HTML Help File (.CHM) created using Dr.Explain.
Finally, I dug in deeper than most Technical Writers would in order to discover some very nice ways to customize the way Dr.Explain analyzes its screenshots in the process of automatically generating callouts for software being documented.